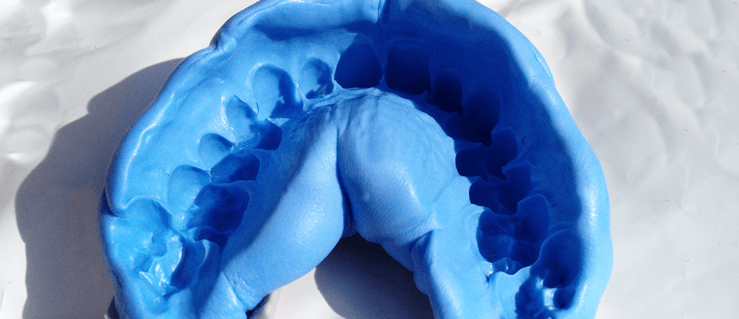
Inspecting Your Impression: 4 Details To Look For

Congratulations, you’re the proud new owner of a Gladiator custom mouthguard!
In order to give you the best possible protection and comfort available, you first must make an impression of your teeth. While the thought of taking an impression may be intimidating — as it is an important process — rest assured it is a simple process that allows you to make an exact replica of your individual mouth structure in the time it takes to brush your teeth.
Your Gladiator Self Impression Kit™ — which you received in the mail following your order — includes easy-to-follow instructions, the impression material and trays, and a pre-paid return mailer. It also includes enough material to take two impressions, just in case!
Once you have taken your first impression, here are some details to look for to be sure you have the best possible impression and tips to follow to make sure you get those details:
1. Fitting The Tray
It’s important to make sure that all of your teeth fit comfortably into the tray when making your impression, so that they are able to sink into the material.
However, the cut of your custom mouthguard should be engineered to make sure there is no material in the soft palate area — the fleshy, flexible part toward the back of the roof of the mouth. That means your mouthguard’s material should stop between the end of the first molar and midway through the second.
When making your impression, you do not need to capture your wisdom teeth, since the material in the soft palate area doesn’t provide any protection from injury. Just discomfort.
Tip: Check the size of your trays before beginning the process. If your teeth are not fitting into the tray, please contact Customer Service.
2. Capturing Your Structure
Your impression is used to create a stone model of your mouth to match your exact, individual mouth structure. That makes capturing each tooth structure essential.
If you don’t see a tooth’s structure in your impression, it won’t be in your mouthguard, and that may lead to a poor fit. Both the inside and outside of each necessary tooth structure should be visible.
Tip: Center your teeth properly into the material in the tray and allow the material to fully surround your teeth.
3. Pushing Straight Up
Not only do you need to capture the inside and outside of each tooth structure, but it must be as clear as possible.
Your impression shouldn’t appear as though your teeth have slid into place, wiggled or pressed into the material twice. It should be a clean imprint of your teeth, as though you had just pressed the material around them.
Tip: Position the tray and material below your teeth before pushing straight up. Do not bite into the material, but push it up onto your teeth. Once in place, do not move or adjust.
4. Deepest Possible Impression
When pushing the tray and material onto your teeth, you want to push as deep into the impression material as possible. This helps to properly capture the full structure of your teeth. It also helps to capture as much of your gum area as possible.
It is important that your mouthguard not only protects your teeth, but the gum area as well. This helps to protect against cuts and keep the tooth roots safe.
Tip: Don’t be afraid to hit the bottom of the tray with your upper teeth. This won’t hurt the impression and makes sure you get as deep as you can.
Making an impression of your exact mouth structure is simple. But if you have any questions concerning your impression, would like more tips, or an early inspection, please contact our Customer Service Team! Just click the link below to reach out.
Putting The Custom In Customer Service


