Making An Impression: 4 Tips For Your Custom Mouthguard
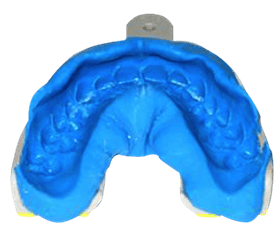
Now that you’ve placed your order for your custom mouthguard, what comes next? It’s time for your impression!
Making an impression is the first step to completing your custom mouthguard and completing your game face. Your impression allows the manufacturer to make an exact replica of your mouth in order for your custom mouthguard to match your individual mouth structure.
While the thought of taking an impression may be scary — as it is an important process — rest assured it is a simple process that only takes as long as it does to brush your teeth. Simply follow these tips and view this video in order to make a perfect impression:
1. Check Your Tray
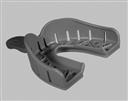 Much like any project, you must measure before you mix. It’s highly important to try the tray in your mouth to make sure it fits before mixing the materials together. If the tray doesn’t fit your mouth, the impression won’t work.
The key to measuring is actually the width of your mouth, not the length. Your back teeth should fit within the tray without touching the sides. If your back molars hit the sides of the tray, it is too small. But fear not, the tray is adjustable! Simply follow included adjustment instructions, or if need be, contact your supplier for a larger tray.
2. Mix Quick
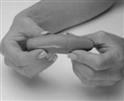 The impression material is a mixture of the two putty materials included in your impression kit, designed to give you a certain amount of time to complete the process before the material hardens. Once you begin to mix the materials, you have approximately one minute to complete the impression process.
In order to mix the materials quickly, squish the combined putty in between your fingertips back and forth until the color is uniform; then, roll and stretch the putty out in a log as long as your palm or approximately four inches. Do not waste too much time mixing slowly as you will want time to properly position the tray in your mouth.
The trick is to keep the materials cool before beginning the process. Keep them in the refrigerator for one hour before you begin.
3. Lift, Don’t Bite
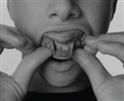 Because your jaw works on a hinge, simply biting into the impression material won’t create a perfect impression. You need to capture a straight motion, and biting into the tray produces drag marks in your impression.
Think about biting into an apple. Your teeth create a concave divot in the apple from where they originally enter to where the bite ends.
In order to get a clean and perfect imprint, you want to push the tray and material up on to your upper teeth and gum area in one straight motion. Use steady pressure and remain still. Make sure the material is rounded not flat — by rolling it with your fingertips — so that your teeth fully sink into the material.
4. Let It Set
 Once the tray is in place on your upper teeth and under your upper lip, you must try to not wiggle, readjust or reset it. The impression is made instantly and if it’s moved once it’s in your mouth, it won’t get a true impression.
Hold the tray still until it is rock hard — typically around five to eight minutes — then remove by slowly applying pressure down on the tab of the tray and on the top edge of the material with your fingertips. Rinse the impression off with soapy water and inspect it to make sure all of the teeth and gums are clearly imprinted.
It’s that simple! Send your impression back to the manufacturer with your personalization form — and your custom mouthguard is ready for production!
With these helpful tips, making a perfect impression for your custom mouthguard is simple and as quick as brushing your teeth.


 Now that you’ve placed

I already have a lower impression at home from my dentist, can I send it in to have lower mouth guard made, and what does it cost?
You will want to email Customer Service at customerservice@gladiatorguards.com with images of your impressions. They will let you know if we can use it and what the next steps are.